Showing posts with label gift ideas. Show all posts
Tuesday, June 21, 2016
Anything but a card!
Good Morning Happy Stampers!!
We hope you are thoroughly enjoying this first FULL day of Summer!! It's hard to believe that June is seriously half over. Where did the time go?
This just means that it is time for another edition of "not another card."
We asked some of our Designers to come up with some cute and creative items that were not cards. This time of year we have a LOT of extra parties, showers, weddings, etc... and sometimes a card just doesn't cut it! And what better way to add some cuteness to a gift or home decor than with your Stampin' Up! products!
Be sure to check out the Designer's blog and see how she created such cuteness!!
Jennifer Gregorsky - Jenny G Paper Crafts
Kathy Alt ~ Kathy's Stamping World
Tuesday, December 10, 2013
Envelope Punch Board Money Holder
We're already on the 10th of December...can you believe it?! As always, this month seems to be flying by! How are you doing with your Christmas gift list?
I don't know about you, but there are oftentimes I simply run out of gift ideas of what to get others or I have those "hard to shop for" people on my list. Sometimes it just works out to give them some cold hard cash so they can go shopping for themselves! ;) I've seen these money holders floating all around blog land recently and with Stampin' Up!'s new Envelope Punch Board, it has taken them up a just a "notch". My inspiration for this post came from Stampin' with Jackie & Stamp with Amy K.
{Item #133774, $19.95}
Start with a piece of cardstock cut 8-1/4" x 7".
Score (on the longer side) at 3" & 6".
On the Envelope Punch Board, line up your score lines horizontally.
Line up the left side of your paper at 3-1/2" and punch.
Slide your paper over to the edge of the punch and punch again!
Using your Paper Trimmer, trim off the edge of the file tab that does NOT have the notch on the end.
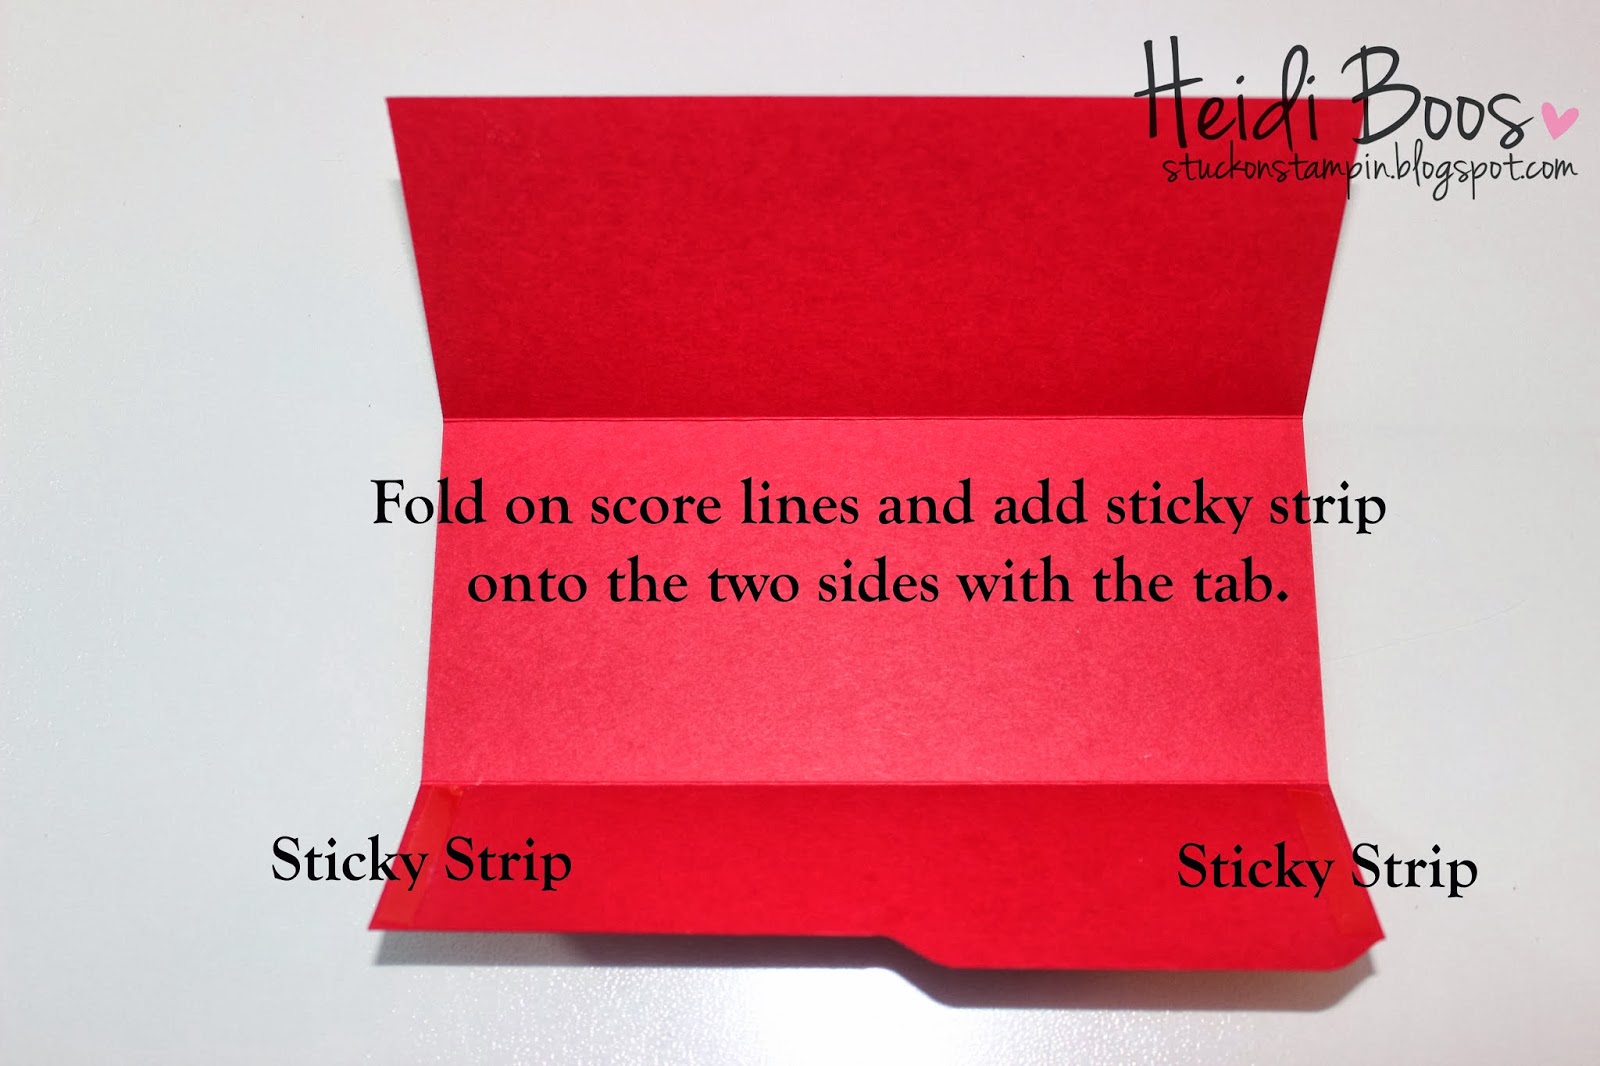
Fold on the score lines and then add Sticky Strip to each side of where the section where the tab is. Fold up to make a pocket.
Embellish to your heart's desire!
The background paper is cut 6-3/4" x 2-3/4". I used Polka Dot Parade DSP in Real Red. The Santa stamp comes from the Tag It stamp set (clear) and I die cut it out using the coordinating Chalk Talk Framelit Dies. I then added an Old Olive banner with a couple of Real Red Candy Dots for a finishing touch. You may not be able to see it very clearly in the picture, but I did add Dazzling Diamonds to the trim of Santa's hat, gloves, and suit.
I decided to keep with the simple design I used on the front of the money holder and added a strip of the same DSP on the inside (1" x 7"). For a trimmed edge, I used the Scallop Dotted Ribbon Border Punch. And to finish it off, I stamped a quick "for you" (Chalk Talk stamp set) and punched it out with the 1-3/8" circle punch, popping it up with a Dimensional. Doesn't that little file folder tab just add a little something extra?
I thought it would be fun to slip it into a vellum pocket, so I cut a piece of vellum measuring 7-3/4" x 6-3/4". I scored at 3-3/8", folded in half and added Sticky Strip to both sides.
I covered up the sides with the Sticky Strip with a 3-3/8" x 3/8" strip of the same polka dot DSP.
Makes a fun little pocket! It would even be cute if you die cute the name of your recipient on the front of the vellum envelope.
Thanks for stopping by today! I hope that you'll take a moment to look around our blog. There are lots of great ideas to be shared!! And, don't forget to link up for this month's Card Sketch!
Thanks for stopping by today for your daily SSInkspiration! Don't forget to check out our Facebook and Pinterest pages for even MORE Inkspiration!
Thursday, December 5, 2013
This and That Gift Giving
Hello and welcome to our blog! I am Tonya and today I have some gift ideas for you that are easy to make and to customize to fit the people in your life. I made all of these in one evening with little stamping.
The first items are a post it note holder and a coordinating pen. I used the Epic Day This and That Designer Series Paper on my projects. I used an Acrylic Frame and cut the Designer Paper to fit. I added just a bit of Ric-a-Rack from the Tasteful Trim Bigz XL Die. The Ribbon is the Pool Party Seam Binding and the Burlap Ribbon. The pen also has the Designer Series Paper in it to match.
Then I decided I needed to do some stamping and what better way to add to the set then with magnets. I stamped on the tiles with the Six Sided Sampler Stamp Set in colors that where found in the Designer Series Paper. I used Pool Party, Calypso Coral, Gumball Green, Crumb Cake and Daffodil Delight. The latter two didn't show up as well as I would have liked. :-( I used Clear Embossing Powder and the Heat Tool to set the ink and protect the tiles, then I just added a magnet to the back of each and they are ready to give.
The final picture is of all the items together. I think they will make a great gift set or you can split up the items and just give one.
Thanks for coming by today and I hope you are Inkspired to create something today.
Tuesday, December 3, 2013
Christmas Gift Giving
Christmas Gift Giving:
Candle and Boxed Card Set
It's Pam again from Stampin' in the Sun (CLICK HERE to go to my BLOG)
with two different gift ideas. I love these because they are PERFECT
for the holidays, or can be changed to be a "generic" holiday gift.
It'd look so pretty with flowers or anything you might like!
First
up is a candle. I will have a tutorial soon. I know I have promised
other tutorials... I have been without a laptop now for a week. I am at
my mom's tonight posting for you! Hopefully I can get several posts
ready for the next few days. Basically the candle is just a 3x3 candle
with a stamped piece of plain tissue paper melted to it. Yes, plain
tissue paper. Please email me at: pam718steckman@gmail.com if you have
questions or want directions!
This
card set is for the boss at my school (aka: the principal). I plan to
give it to her later this week. I made sets of cards for all of the
office staff. I will give them this "early" gift so they can use them
over the next few weeks!
This
is the front of the box, the snowflake is a belly band I made. Another
tutorial coming on how to make this amazing box. Again, email me with
questions! I promise to help!
This
is the card that is inside the box. I made 8 of the same card with 8
matching envelopes that are lined. And they all fit perfectly inside
that box!
Please
make sure to subscribe to our blog for tons of awesome ideas during the
holidays and going forward... feel free to go back as well and check
out the other amazing ideas! We have a wonderful team of paper crafters
who would love to INKspire you!
Monday, November 25, 2013
making a list...checking it twice!
Happy Monday Stampers! I have a fun little project for you today to help make your Christmas list making just a little more fun...plus these make great little gifts! I have made these in the past for craft bazaars and a couple of years ago we made one for a Christmas event I hosted. They are always a hit! If you'd like come on by to visit my blog for more fun ideas, you can find me at Stuck on Stampin'
I bought a package of these list pads from Staples. They started out as 5" x 8".
For a small fee, Staples will cut these pads in half to make two smaller list pads. They will do half of the stack at a time (I think it comes as a pack of 12).
Using SNAIL adhesive, adhere the two pieces of cardstock together.
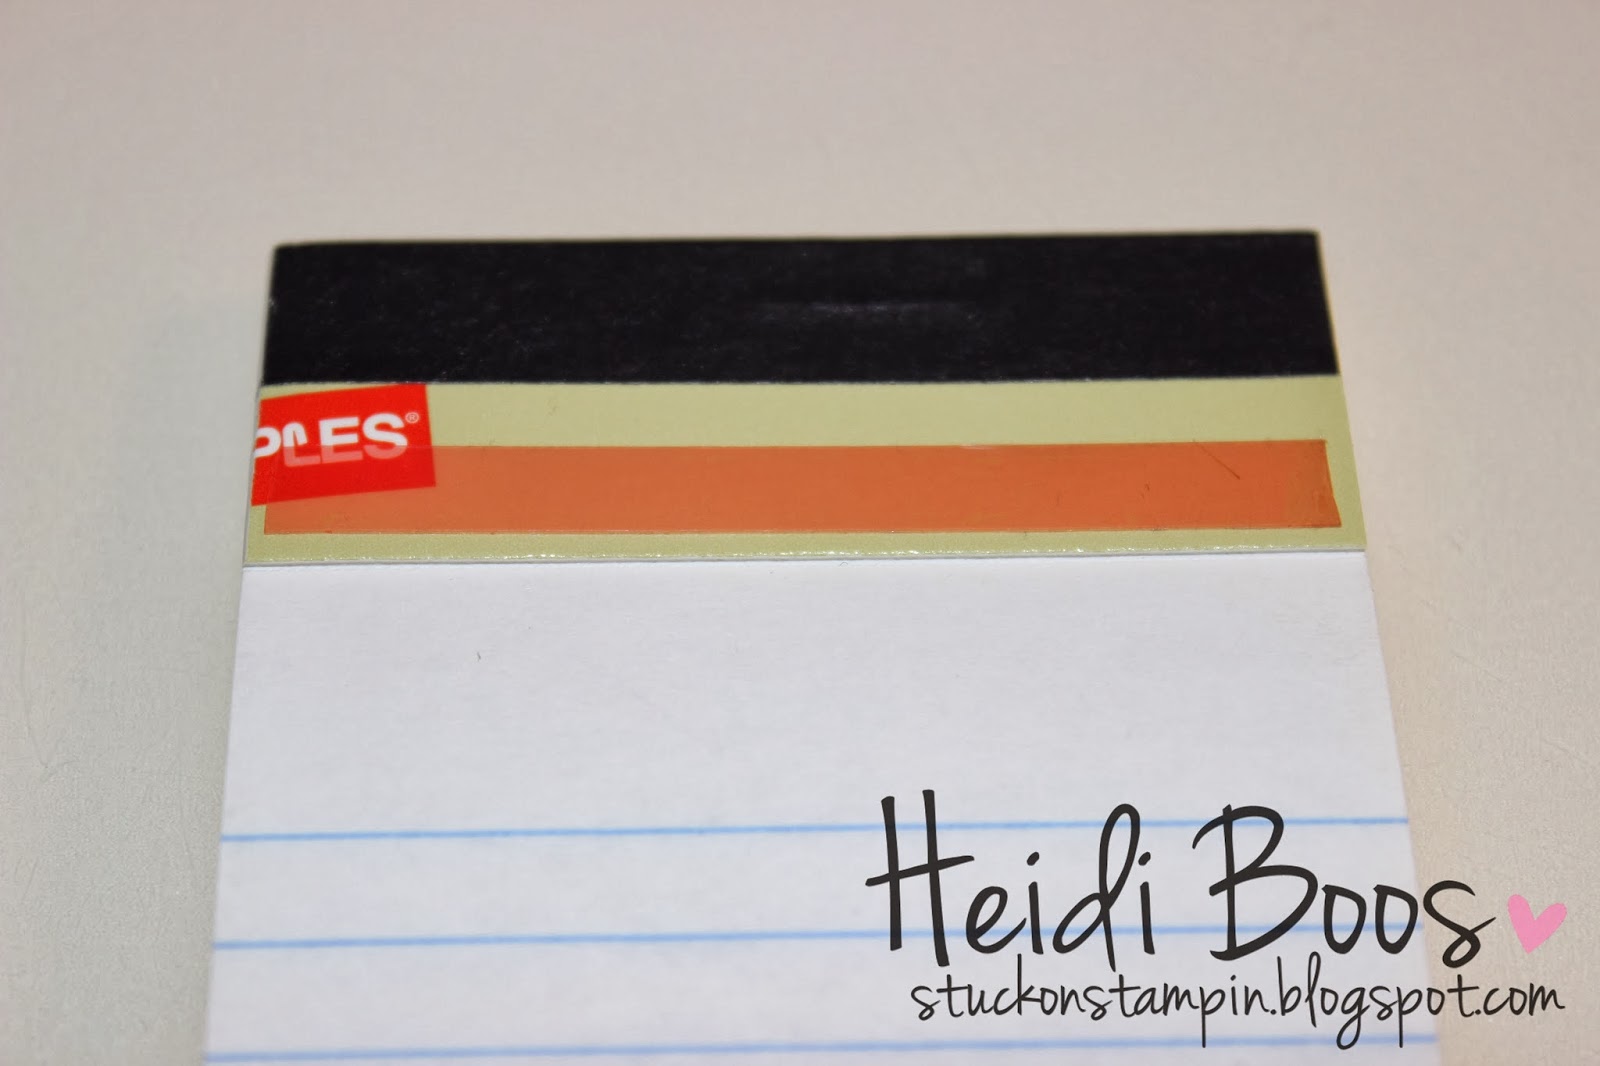
Place a piece of Sticky Strip on top of the list pad.
Place the piece of DSP on the Sticky Strip piece and then fold over the top to the back.
After wrapping the top with ribbon, place three pieces of Sticky Strip on the back of the pad.
And adhere to the pieces of cardstock and embellish!
Covered List Pad
Crease on the score lines.
Wrap a piece of DSP over the top of the list pad. Place Sticky Strip on the back.
Adhere to the inside of the cardstock piece.
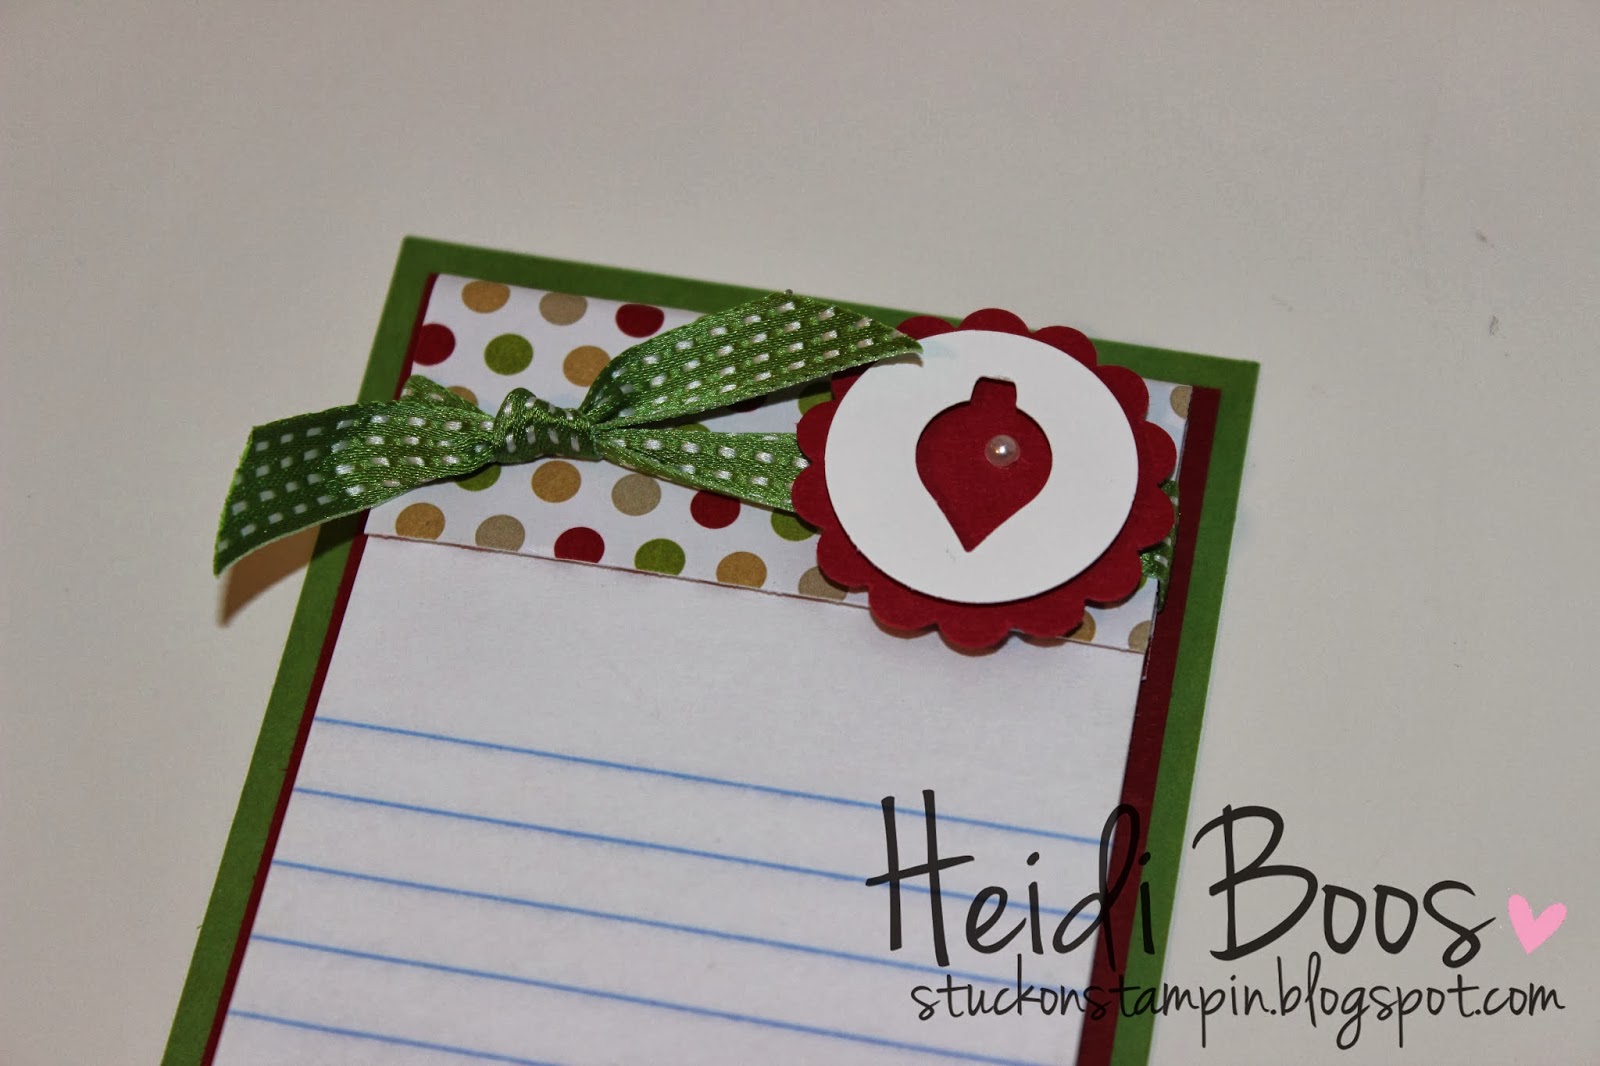
Embellish and tie with a bow.
Might be hard to see, but I added some Dazzling Diamonds glitter to Santa's outfit.
Thanks for stopping by!!
Thanks for stopping by today for your daily SSInkspiration! Don't forget to check out our Facebook and Pinterest pages for even MORE Inkspiration!
Labels:
Christmas,
gift ideas,
Heidi Boos,
Individual Post
Thursday, November 21, 2013
A Krafty Little Snow Man
Happy Thursday friends! It's Breelin here today with a fun way to use the Kraft boxes that are available. I love these boxes and was thrilled when the Decorative Window and Extra-Large Gift Box came out in the Holiday Catalog. They are a lot of fun to decorate and even more fun to turn into...
A SNOWMAN!
Isn't this little guy fun?!?! I made my own window boxes out of the Extra Large and Kraft Gift Box by tearing them apart and running them through the Big Shot with the Circle Framelits...add some Window Sheet and voila!
I added some shredded Whisper White cardstock, but have plans to fill them full with some yummy Christmas treats for a special friend who loves snowmen!
Be sure to check out my blog for full details on how this little guy came together.
Don't forget to check back tomorrow for Jenn's individual post! She has some super cute cards to share with you!
Hope I've INKspired you to create today!
Happy Stamping!
Tuesday, October 8, 2013
(Sun)Bursting With Tips and Ideas
Darcy here from Dj's Stampin' Place. I have been having so much fun making the Sunburst cards. I think everyone who has seen page 110
of the 2013-2014 Stampin' Up! annual catalog has fallen in love with
this technique. Have you tried the Sunburst technique yet? It is much
easier than it looks! Today I will INKspire you with some samples, tips,
and gift ideas all featuring Sunburst.
Today I played with the technique on a larger scale than I had before and made a gift for my Grandma with a matching card for her birthday.
Here are two Christmas cards that I made recently. You can find detailed instructions for them by visiting my blog.
Thank you so much for joining me today. As you can see, the Sunburst technique isn't just for cards. It can be adapted for wall art, and even scrapbook pages.
Be sure to stop in tomorrow when Kim will have some fabulous Halloween INKspiration for us!
Today I played with the technique on a larger scale than I had before and made a gift for my Grandma with a matching card for her birthday.
I
chose Designer Series Paper from two different packages. The yellow and
the written page is from Afternoon Picnic. The green is from Birthday
Basics. I also used Blushing Bride cardstock embossed with an embossing
folder.
To
begin you will cut your paper into strips. The size depends on the
scale of you project. You want the strips to be longer than your
starting point to the edge of the paper so that they hang off the edge.
For this 8" X 10" project, I cut my strips 3" X 6". Then use your paper
trimmer to cut them in half along the diagonal. The frame used two
strips of each paper, or four triangles each. The paper that you glue
your strips on can be a piece of scrap cardstock or lightweight
cardboard.
In
the first picture, you can see that my starting point was roughly in
the middle of the page. You then just glue them down in the order than
you wish, always making sure that they are touching and that the strips
extend past the edge of your paper. *Watch your corners* You may have to
adjust the placement to make sure that the corners are completely
covered. The second picture shows the gluing part almost finished. The
third picture is a view of the back and shows how you can see the strips
extending.
After
you have all the strips glued down, you will use your Paper Trimmer or
scissors to trim the excess off all four sides. You can see the trimmed
project in the last picture. As you can see, where your points meet does
not have to be perfect as you will be covering it up.
Here is the upcycled frame before I painted it with Absolute Vintage Milk Paint.
For
the card, I started with a piece of 3.75" X 5" cardstock. I had several
triangles left that I had cut and not used for the frame. I trimmed
them down to 1.5" and then re-cut the diagonal. Part of what I cut off
was a short, wider triangle. As you can see I ended up using both
sizes.
I
wanted the Sunburst to be off center on the card, so you can see in the
first picture where I started my point. Once again, the spot where the
points meet does not have to be perfect as you can cover it with some
type of embellishment.
Thank you so much for joining me today. As you can see, the Sunburst technique isn't just for cards. It can be adapted for wall art, and even scrapbook pages.
Be sure to stop in tomorrow when Kim will have some fabulous Halloween INKspiration for us!
Subscribe to:
Posts (Atom)