
I don't know about you, but there are oftentimes I simply run out of gift ideas of what to get others or I have those "hard to shop for" people on my list. Sometimes it just works out to give them some cold hard cash so they can go shopping for themselves! ;) I've seen these money holders floating all around blog land recently and with Stampin' Up!'s new Envelope Punch Board, it has taken them up a just a "notch". My inspiration for this post came from Stampin' with Jackie & Stamp with Amy K.
{Item #133774, $19.95}

Start with a piece of cardstock cut 8-1/4" x 7".
Score (on the longer side) at 3" & 6".

On the Envelope Punch Board, line up your score lines horizontally.
Line up the left side of your paper at 3-1/2" and punch.

Slide your paper over to the edge of the punch and punch again!

Using your Paper Trimmer, trim off the edge of the file tab that does NOT have the notch on the end.

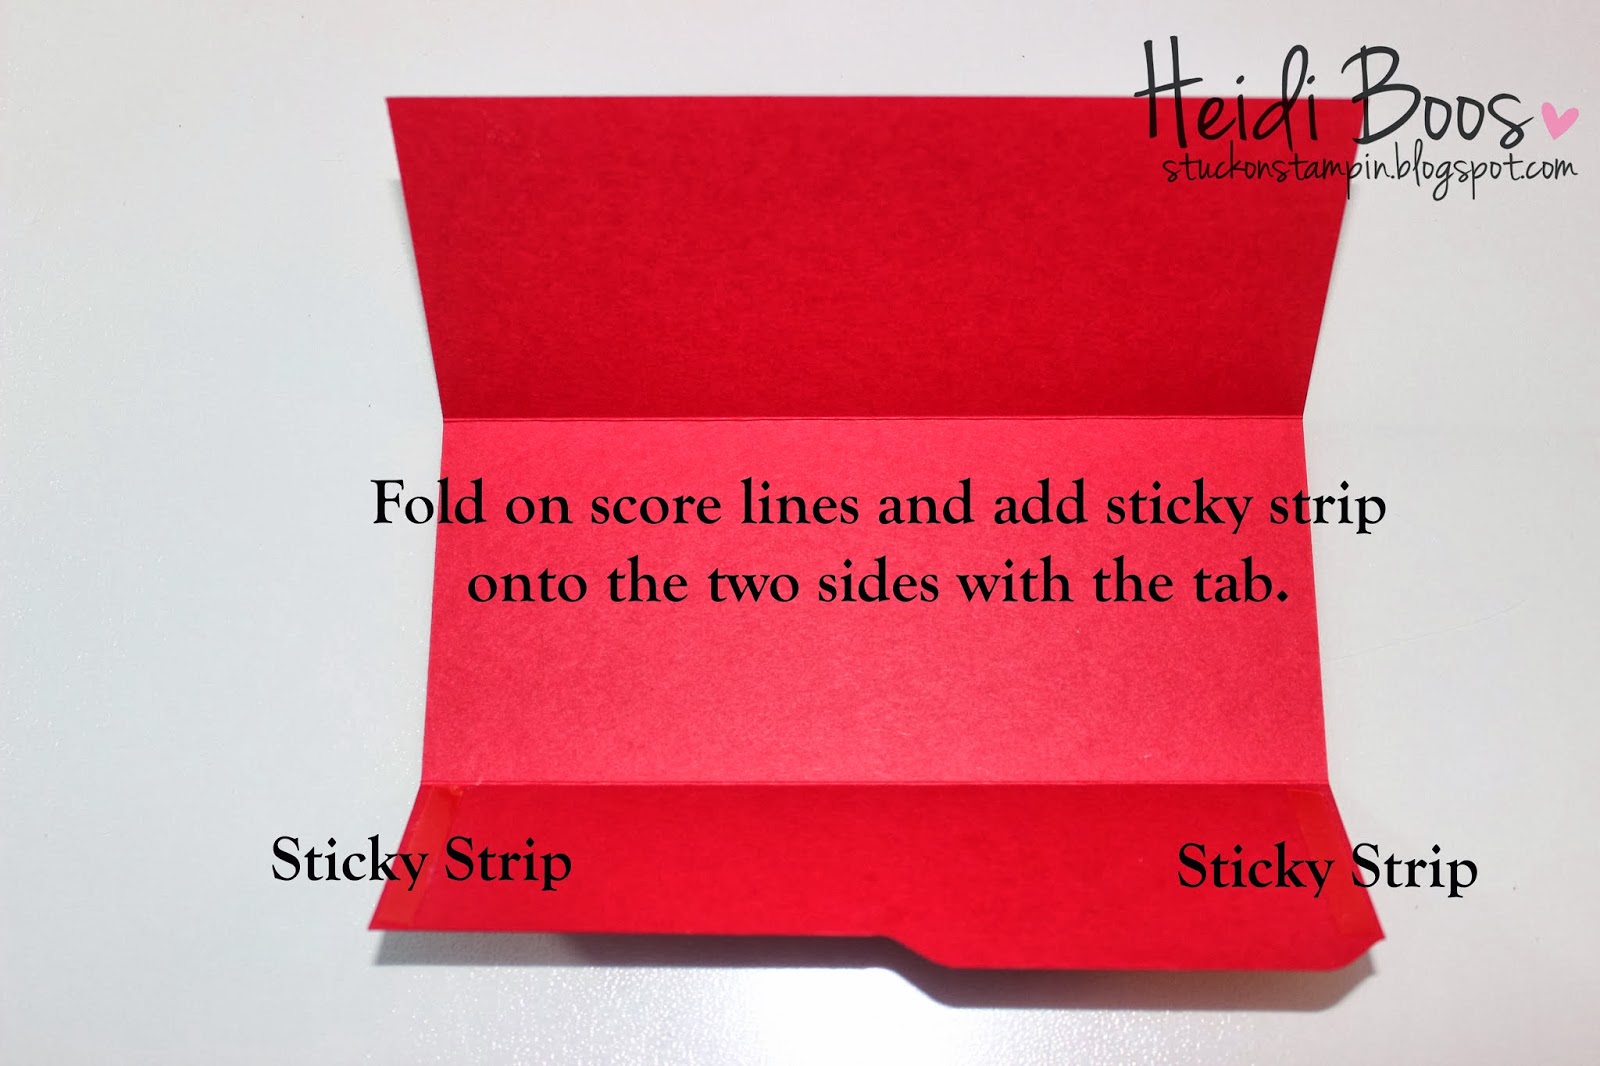
Fold on the score lines and then add Sticky Strip to each side of where the section where the tab is. Fold up to make a pocket.
Embellish to your heart's desire!
The background paper is cut 6-3/4" x 2-3/4". I used Polka Dot Parade DSP in Real Red. The Santa stamp comes from the Tag It stamp set (clear) and I die cut it out using the coordinating Chalk Talk Framelit Dies. I then added an Old Olive banner with a couple of Real Red Candy Dots for a finishing touch. You may not be able to see it very clearly in the picture, but I did add Dazzling Diamonds to the trim of Santa's hat, gloves, and suit.

I decided to keep with the simple design I used on the front of the money holder and added a strip of the same DSP on the inside (1" x 7"). For a trimmed edge, I used the Scallop Dotted Ribbon Border Punch. And to finish it off, I stamped a quick "for you" (Chalk Talk stamp set) and punched it out with the 1-3/8" circle punch, popping it up with a Dimensional. Doesn't that little file folder tab just add a little something extra?

I thought it would be fun to slip it into a vellum pocket, so I cut a piece of vellum measuring 7-3/4" x 6-3/4". I scored at 3-3/8", folded in half and added Sticky Strip to both sides.

I covered up the sides with the Sticky Strip with a 3-3/8" x 3/8" strip of the same polka dot DSP.

Makes a fun little pocket! It would even be cute if you die cute the name of your recipient on the front of the vellum envelope.

Thanks for stopping by today! I hope that you'll take a moment to look around our blog. There are lots of great ideas to be shared!! And, don't forget to link up for this month's Card Sketch!


