Monday, June 30, 2014

Quick & Easy Cards

Today some of the designers wanted to share with you some quick and easy cards to help inspire you to pull out your ink, paper, and stamps to create something simple and fun for that certain someone! Cards don't always have to be decked out top to bottom...sometimes they just need a little bit of love and a simple work of art. 

Thanks for stopping by! Be sure to head to each of the designer's blogs (listed below each picture) to check out all the details for each card.

As always...

Pin it if you love it!!

Pam Steckman ~ Stampin' in the Sun


 Heidi Boos ~ Stuck on Stampin'


Jennifer Blomquist - Northwest Stamper


Kim Ryden ~ Stamping with Kim


Donna Smit ~ Organized Chaos

Thanks for stopping by today for your daily SSInkspiration! Don't forget to check out our Facebook and Pinterest pages for even MORE Inkspiration!

Friday, June 27, 2014

June Friday Favorites!

Hello and welcome to our June Friday Favorites. I love Friday Favorites and I hope you do too! With the new catalog starting this month you are sure to see some new items that might soon become favorites of yours. If a card is a favorite be sure and pin it with the Pin It Button. You can pin all the cards if you like. Now it is time to sit back and enjoy our Friday Favorites. Have fun!

Pam Steckman ~ Stampin' in the Sun


Heidi's Favorite: All Abloom DSP Stack

Heidi Boos ~ Stuck on Stampin'


Jennifer Blomquist - Northwest Stamper

Tonya's Favorite Whisper White 5/8" Satin Ribbon
Whisper White 5/8" Satin Ribbon by Stampin' Up!
 Tonya Ball~ Stampin' With Tonya

Thanks for stopping by today for your daily SSInkspiration! Don't forget to check out our Facebook and Pinterest pages for even MORE Inkspiration!

Thursday, June 26, 2014

Art INKspired Challenge

Today we are looking to Claude Monet for a little INKspiration to create some cards!

Here is the painting that we used as our INKspiration...

Impression Sunrise 
by Claude Monet


And here is what our Design Team created for you...

Melissa Cochran ~ Crazy Paper Freak


Donna Smit ~ Organized Chaos


Shellie Grindy~ Craft Smashup


Cynthia Richards ~ Ink a Doodle Creations


Kim Ryden ~ Stamping with Kim


Take some time to visit each of our Designer's blogs today to see what INKspired them!  We love to hear from our readers and hope that you have a fun day of stamping ahead of you!

Thanks for stopping by today for your daily SSInkspiration! Don't forget to check out our Facebook and Pinterest pages for even MORE Inkspiration!

Wednesday, June 25, 2014

Christmas Cheer by Donna

Good Morning!!  My name is Donna from Organized Chaos bringing you a little Christmas Cheer on this fine first week of summer!  (that's totally normal...right?)

My daughter is OBSESSED with the movie Frozen...(as are most soon-to-be 8 year olds across America)  and as luck would have it, she has a birthday in the summer and is insisting that I make Frozen birthday party invitations/decorations.  If this piques your interest....Come back next month for her entire party post!!
I have winter on the brain, BIG TIME!  (thanks Olaf and Anna)

I am a "non-traditional" Christmas card maker.  I don't own a single Christmas stamp set...
Now I know what you're thinking, "wait..what did she just say?!"
I love nothing more than to grab a few random stamp sets and start "making Christmas"  

Here is my first of many attempts this summer (yes, I make my Christmas cards in the summer...I have more time!!)

  
Folks:  There is a reason this stamp set is on backorder.  It does EVERYTHING!!  Work of Art is quickly becoming my go-to stamp set.  Its amazing what you can do with a few random shapes and a very forgiving watercolor texture.
   I used the "rainbow swoop, the thick blob, and the scribble to make the tree.  I used Mossy Meadow ink and just randomly stamped and stamped and stamped (without re-inking) the stamp for different shades of the green.


I LOVE the texture this stamp set has!!  And for the trunk, I inked the "scribble" in Baked Brown Sugar, then I used an Early Esspresso marker to make it look like bark.  Easiest way EVER to add different colors in one stamp.  I LOVE our markers!!

And can I just say, no one is more excited about the 1/8 and 1/4 inch punches coming back in handheld form.....!!!
Punch Punch Punch!!  This is a PERFECT way to use up those 1/2 inch strips of paper you KNOW you have in a box somewhere that you swear you're going to use!  Make confetti, or in this case, Christmas bulbs on a tree.  Make anything you want.  I love how quick and easy punches are!

Okay:  so I know you see a "Christmas" stamp and you're ready to say, But Donna...you said....
Check out this cute little set that you can have for only $8.95!!
 Oh Goody!

Fun isn't it?!

I hope this gives you a little inspiration (and motivation!) to use your Work of Art stamp set.  And if you are one whose set is on backorder...I promise it is worth the wait.

And just so you don't think I'm completely crazy, here is a card I made for Summer using this set.


Thanks for stopping by today for your daily SSInkspiration! Don't forget to check out our Facebook and Pinterest pages for even MORE Inkspiration!

Tuesday, June 24, 2014

Summer Fun!

Our designers have created some yummy and fun projects to share with you today. Pin It if you love it, and remember to visit each designer's blog for more details on their project. Thanks for joining us to see what makes us think of Summer.


Cynthia Richards ~ Ink a Doodle Creations
Breelin Renwick ~ Craft-somnia Momma


Diana Eichfeld ~ Stampin' Fun with Diana


Darcy Johnson ~ Dj's Stampin' Place


Kim Ryden ~ Stamping with Kim

Thanks for stopping by today for your daily SSInkspiration! Don't forget to check out our Facebook and Pinterest pages for even MORE Inkspiration!

Monday, June 23, 2014

Masculine Monday

It's Masculine Monday and we have a handful of cards to share with you today! We hope that you are inspired to pull out your stamping goodies to create something to send to your favorite men in your life! Please be sure to stop by our designer's blogs for more information on the card...just click on the name under each picture!

Thanks for stopping by!

Pam Steckman ~ Stampin' in the Sun


Darcy Johnson ~ Dj's Stampin' Place


Melissa Cochran ~ Crazy Paper Freak


Donna Smit ~ Organized Chaos


Thanks for stopping by today for your daily SSInkspiration! Don't forget to check out our Facebook and Pinterest pages for even MORE Inkspiration!

Friday, June 20, 2014

Project Life!

When Stampin' Up! announced it was going to carry a new line of scrapbook supplies I was excited and ready to see what this new line would have and I have not been disappointed. From the Card Collections, the Accessory Pack, Pocket Pages, stamp sets and let's not forget the Framelits, this new line has something for everyone and as you can see from the projects below it isn't all about scrapbooking either. You can use the elements for cards too! We hope you enjoy and are INKspired today and remember to Pin all the samples so you have them handy later. 


Erica Bass ~ Stamping Starlette


Jennifer Blomquist - Northwest Stamper


Darcy Johnson ~Dj's Stampin' Place


Darla Roberts~ Stampin w Darla and Sisters


Tonya Ball~ Stampin' With Tonya


Kim Ryden ~ Stamping with Kim
 
 
Cynthia Richards ~ Ink a Doodle Creations


Thanks for stopping by today!


Thanks for stopping by today for your daily SSInkspiration! Don't forget to check out our Facebook and Pinterest pages for even MORE Inkspiration!

Thursday, June 19, 2014

You Light Up My Life

Hello there!
I hope this Thursday finds you well and in a creative mood. Shellie of Craft Smashup here and I've got a fun little project for you today. This idea has been around since I was a kid. I remember making these all of the time. Same with its cousin, the woven construction paper place mat.

The little lanterns are made with Stampin Up's All Abloom paper stack. The stack has some of the colors from each of the In-color families as well as the core line of colors. It's amix of geometrics and flowers, whimsical designs and classical designs. If you are like me and like both modern and somewhat vintage then this is the perfect little paper stack to get.

I don't know about you but I love decorating my deck and in our new house we have a multi-level deck. Perfect for hanging decorative lanterns all over the place. The deck is also where we entertain the most so having little accents of color will be a nice touch.
How about a little tutorial?

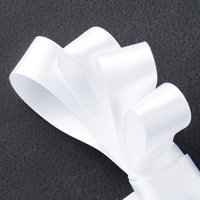
Here is what a single lantern looks like. It is just over 2" tall:


TUTORIAL
~~~~~~~~~~~~~~~~~~~~~~~~~~~~
Tools Needed:
6 x 4 1/2" dsp stack 
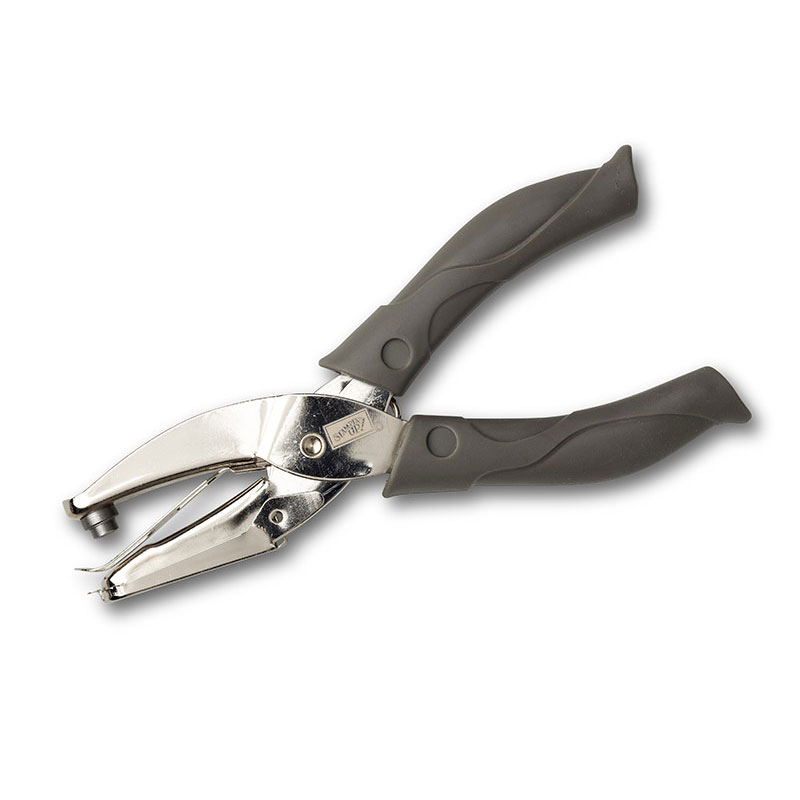
piercing tool  or 1/16'-1/8" hole punch
scoring board/tool
sharp craft knife
liquid adhesive
string or ribbon


STEP 1:
Cut your  sheets of 6 x 4 1/2" dsp at 2 1/4" longways

STEP 2:

Score on the long edges at 1/4", 1 1/8" and 2"
Marker lines are to make the lines easier to see for tutorial purposes. I did not use lines on my projects.

Turn the DSP so that the long edge is at the top of your scoring board. Starting at the 1/4" score-line score down to the lower 1/4" score-line every 1/2"DO NOT score all the way from edge to edge, your little lanterns will not maintain a nice round shape if you make that mistake.

STEP 3:
On a self-healing mat or stack or several layers of newspaper/scrap paper use the craft knife to cut the 
1/2" score-lines between the top and bottom 1/4" score-lines.

Once your cuts are all made fold each of the score lines so that your paper looks like this

STEP 4:
Run your fingers or a bone folder along the long edges of the lantern (sort of like you would if you were curling ribbon). 


Don't do it too hard though or this might happen :(

If you run your fingers along the scored edges your finished lanterns will look more like the one on the right. If you don't it will look like the one on the left


STEP 5:
Use adhesive (I like the liquid Tombow Multi- it allows for wiggle room) to adhere one end of the strip to the other, making sure your score-lines are lined up.

Once the adhesive has dried use a piercing tool or hole punch to poke holes on either side of the lantern. There should be 5 segments between each place that your pierce the hole.

String your lanterns on to your choice of string or ribbon. Tie loops in the end of the string or ribbon with an overhand knot. And hang wherever you like. You can adjust the spacing of the lanterns once you have them hung.

Sorry the pic is blurry! I used the panorama mode on my phone and there is a slight breeze today...

If you like the option of using a string of lights use a hole punch to punch a 7/8" -1" circle and a 1/4" x 2" strip of card stock. Attach the circle to the strip of card stock making sure it's centered. Once the adhesive has dried use a craft knife to cut a cross in the circle section. Make sure you go all the way through both layers. 

Push the lightbulb of a set of miniature Christmas lights through the cross-cut and now you have some pretty lanterns to light up your night.

AND if you want to make a larger coordinating lantern you can do that too

I used a full sheet from the All Abloom paper stack and embellished it with candy dots. I'm going to try one of those battery operated candles in this one to see what it looks like. I think this would look nice on my patio table.

Have a great day everyone! See you again soon!


Thanks for stopping by today for your daily SSInkspiration! Don't forget to check out our Facebook and Pinterest pages for even MORE Inkspiration!