Darcy here from
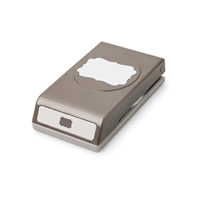
Dj's Stampin' Place. Today I have some treats (and tutorials) for you; using the envelope punch board. (You can find videos for these in cyber land if you're more of an auditory and visual learner versus just a visual learner.)
The envelope punch board is so versatile. I've used it plenty, and still have yet to make an envelope with it! Let's start with the treat holders:
To begin, you need a 4-1/4" X 4-1/4" piece of Designer Series Paper. I used the Natural Composition Specialty.
Line it up with the 1-1/2" mark on the Envelope Punch Board (EPB) (fig.1). Punch and score.
From there, complete the punch and score on each side as you would for making an envelope; lining the "tail" up with the score mark to know where to punch and score (fig.2).
Once you have completed all four sides, use the corner rounder on one of the larger flaps, and trim 1/2" off the other large flap (fig.3).
Fold on each score line. No need for a hard crease.
Place 3 Dove Chocolates (or any fun size candy bar) inside (fig.1)
Fold sides in, bottom (the cut side) up, and top down (fig.2). This requires holding the chocolates in place, or they will try to pop out. (Occasionally, holding your tongue just right helps too!)
Tie with ribbon (fig.3) I used the White Organdy Ribbon and spritzed it with Cajun Craze.
Fun, simple, and no glue!
Now, on to the card box.
To make a box that will hold A2 sized cards, you will start with a 9" X 9" piece of cardstock.
Line it up with the 3-1/2" mark, punch and score (fig.1)
On the same side, move it down to 4-1/2" and punch and score again (fig 2).
Turn the cardstock 180 degrees (opposite side) and repeat those two steps.
On the other two sides, complete at you would an envelope, by lining the "tail" up on the score mark before punching and scoring. You will want to do this for each score mark.
Cut into the score lines on the top and bottom to make the little flaps. I actually cut the little flaps off on the top part of the box, as I'm leaving the top open on mine.
Fold on each score line. The box will hold up better if you use a bone folder on each fold for a hard crease.
Place Sticky Strip on the little flaps, and along the bottom of the inner big flaps.
 |
| Finished box with four cards and envelopes |
|
|
I made these treat holders and card boxes for my co-workers as part of a Make A Difference Giving area that I put together. You can read about what we're doing, and see pictures of my completed display on my personal blog today.
Making A Difference at Dj's Stampin' Place.