

....can turn into all this and much more!
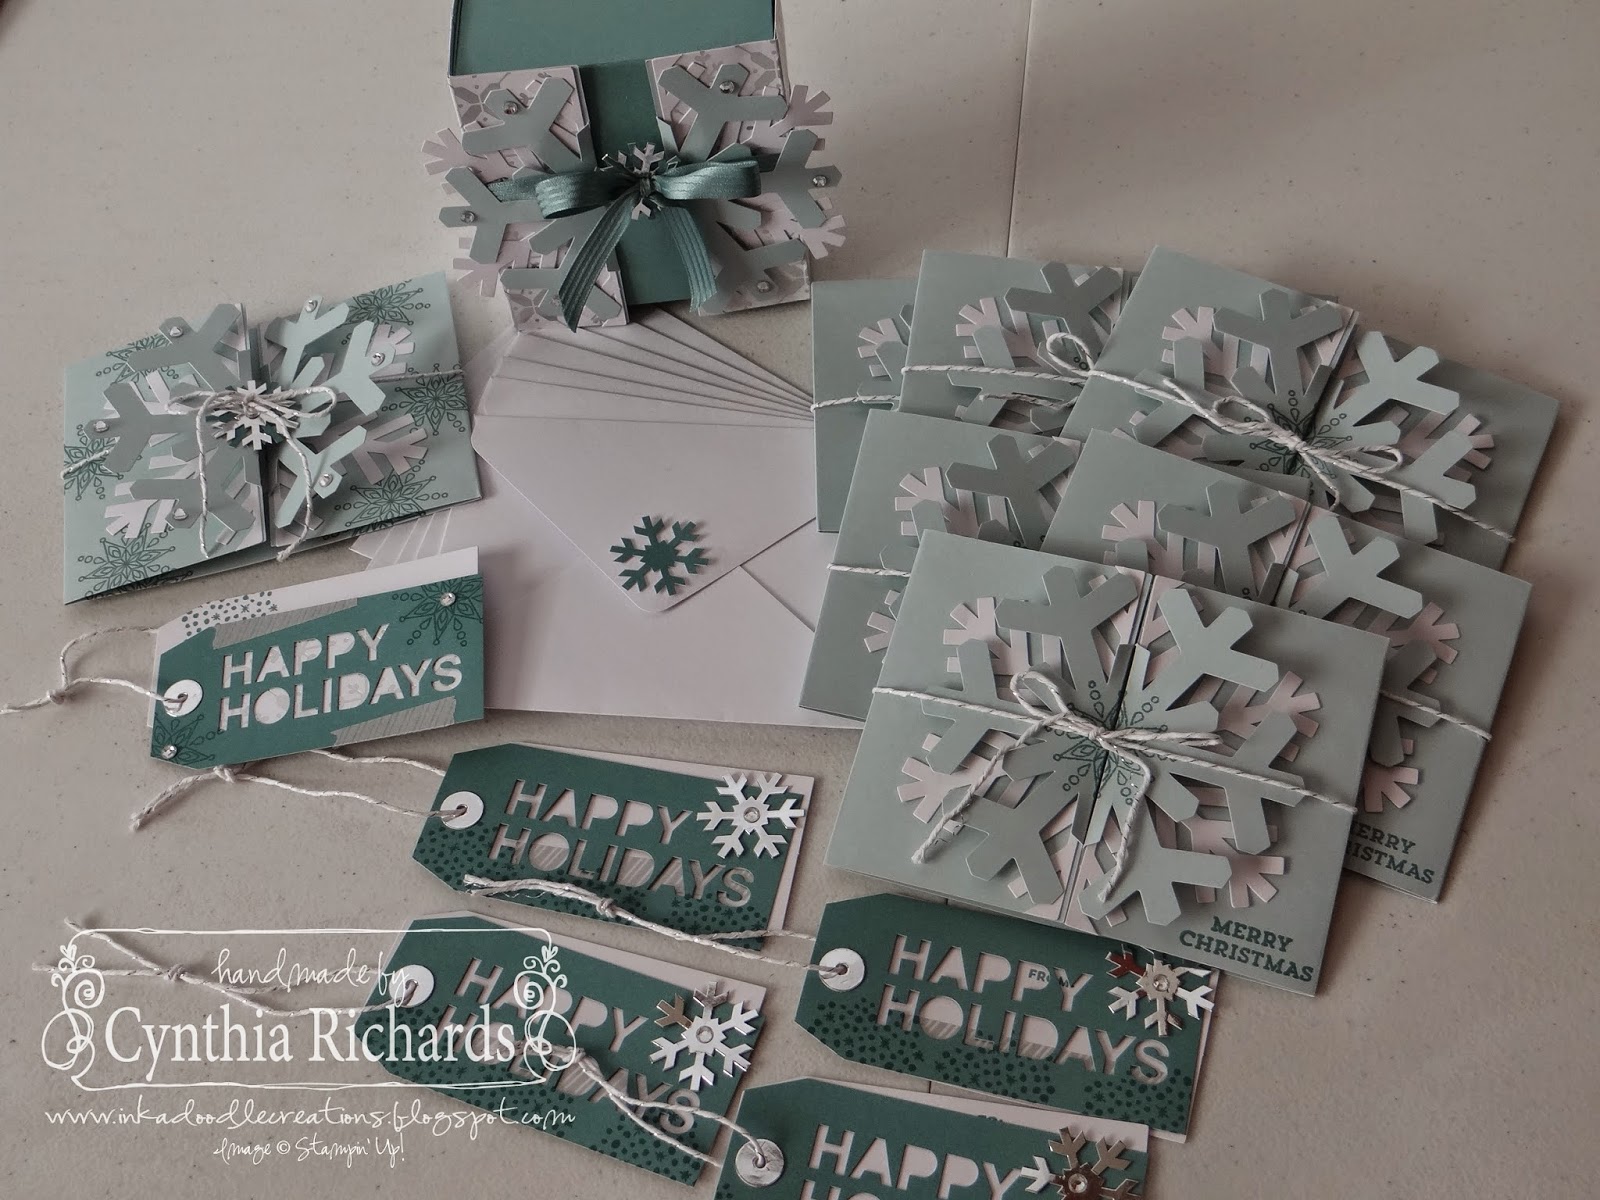
I needed to create some quick and easy Christmas cards to hand out to my neighbors. I used all the supplies included in the kit to create the projects just like they are shown in the instruction papers included in the kit. BUT, yes like everyone else, I enjoy editing it a little to make it my own as well as using the left over parts (cause Stampin' Up! does a wonderful job at giving you plenty and lots of extras) to create something new. (stay tuned for next weeks scrapbook page!!)

So for the most part, my card is created the same as the others. I just stamped with the snowflakes, added some rhinestones to the tips of the large snowflake and added the die cut lost lagoon and silver foiled snowflakes to the center.

I also created a different stamped tag. I added a piece of DSP behind the "happy holidays" cause it matches.....

...this cute little box wrap. This is the project that I will be sharing the instructions for, so that you can recreate it on your own. I created box #12 (as I have numbered them from the 1st size down to the last size, to know which one I need for future use) for the wrap to go around. It was the closest box in size that can be made with the Box Punch Board. The box slides easily in and out without having to untie the bow and messing it all up!!!

To cover up the added score lines, I covered it with a piece of DSP from the All Is Calm pack. I also used about a 24" piece of lost lagoon satin ribbon to wrap around instead of the twine, as I wanted it to be a little more sturdy.

If you look closely, I used the beginning score lines of the card to start getting the score lines I needed to wrap the box. I didn't want to make anymore new lines than was needed. The two together help show where I began. You will use the two provided score lines on the card to work off of to get your others.

So if you start from the first score line (the one that is already on the card) you measure in towards the center 3/4". Do this on the other side as well. Adding these two score lines gives you the bottom section for the box to sit on as in the picture below. The box fits perfect now in between.

Now start from that newly created scoreline and measure back 1-15/16" towards the snowflake end on each side. Doing this give you the lines you need to have it wrap over the sides of the box and top as shown in the next picture.

Remember, you will not use the starting score line that comes on the card already. It will get covered by the DSP and you won't be able to see them from the outside.
I hope you have enjoyed my snowflake projects. Leave some "love" and if you have any questions, leave a comment and ask away. I'll be glad to help you recreate it for yourself!
Supplies Used
November My Paper Pumpkin Kit
lost lagoon satin ribbon, box punch board, all is calm DSP pack
Love these projects Cynthia, thanks for the additional ideas for this kit!
ReplyDeleteNow I am bummed I made them all into cards. Super cute!
ReplyDeleteThanks ladies! Funny thing is, when I saw the shaped snowflake card, the first thing that came to mind was a box wrap!! I have really enjoyed this kit!
ReplyDeleteWhat a great kit. Sorry I didn'tget this one! TFS
ReplyDeleteLove how you made this your own! ~Laura
ReplyDelete