Showing posts with label Decorative Masks. Show all posts

Thursday, July 2, 2015

Product Focus: Decorative Masks

Our Product Focus today is...Decorative Masks!

What's a decorative mask? Think stencils, but updated for today's crafting. It's so easy— just place the mask over cardstock, fabric, or other material and add a little color! 

You can...
* Spritz using ink, chalk, or glimmer sprays. 
* Sponge using ink or paint. 
* Trace using markers. 
* Emboss using VersaMark ink. 

Create backgrounds for scrapbook pages, cards, gift bags, and more. 


Here are the 3 sets of Decorative Masks that Stampin' Up! offers in the NEW catalog!


And here is what our Design Team Members created for you today!  Make sure you stop by their blogs to learn more about them and their projects today!

Carrie Rhoades - Carrie Stamps


Pamela Wu - Stinky Tofu


Tobe Buffenbarger - The Craft Sea


Melissa Stout ~ The Stamp Doc


Kim Ryden ~ Stamping with Kim

Thanks for stopping by today for your daily SSInkspiration! Don't forget to check out our Facebook and Pinterest pages for even MORE Inkspiration!

Wednesday, September 17, 2014

Scrapbooking w/ Kim

Hi Everyone!  It's Kim here!  I have been a traditional scrapbooker for 12 years now!  I feel like a lot of the crafting industry is going away from the traditional scrapbooking and moving to digital or Quick & Easy like Project Life by Stampin' Up!  But I have 40 full albums and I'm still going strong!

Now, don't get me wrong, I LOVE My Digital Studio and I ABSOLUTELY LOVE Project Life by Stampin' Up!  And I use both.  BUT...NOTHING beats a traditional scrapbook layout!

Today I'm going to show you 3 of the latest layouts that I created for my Scrapbook Club ladies.  Each month they come to my house and get to create a fun layout!  I love to show them how easy it is to use Stampin' Up! products to scrapbook!

July Club Layout
I loved using the June My Paper Pumpkin kit on this layout!  The Pinwheel is just SO CUTE as an embellishment!!

Supplies Used
DSP: Maritime
Stamp Set: Be The Star
Big Shot: Stars Collection Framelits


 August Club Layout
This month I showed my club how easy it is to use Embossing Folders on your scrapbook layouts!

Supplies Used
DSP: Typeset Specialty
Stamp Set: Day to Day, Skinny Mini, Remembering Your Birthday
Big Shot: Word Bubbles Framelits, Large Dot Embossing Folder, Alphabet Press Embossing Folder, Arrows Embossing Folder


September Club Layout
I showed the ladies in my club how easy it is to use the Decorative Masks while scrapbookng!  SO CUTE and SO EASY!

Supplies Used
DSP: Flashback
Stamp Set: Snapshot Single Stamp
Big Shot: Circles Framelits
Punches: 1-3/8" Circle, 1-1/4" Circle


Thanks for stopping by today!  I hope that you were INKspired to scrapbook a little today!  We will see you back here today with another Stamp Set Focus post!

Thanks for stopping by today for your daily SSInkspiration! Don't forget to check out our Facebook and Pinterest pages for even MORE Inkspiration!

Tuesday, September 2, 2014

Technique Tuesday! Decorative Masks

Welcome to another edition of Technique Tuesday!!
Don't forget to check us out on Facebook and Pinterest for more great techniques and ideas!

Donna here from Organized Chaos to show you a thing or two about Decorative Masks.
What are those?  (glorified stencils!)
Anything you use to stamp/ink/add color to an image or paper that covers some other parts: a mask
for this example we're using the Dots and Stripes Decorative Mask by Stampin' Up!  (there are 2 different sets available for purchase, only $2.95 for a double mask set!)

Hearts & Stars Decorative Masks by Stampin' Up!  Dots & Stripes Decorative Masks by Stampin' Up!

  Okay, so for this example we are using BOTH masks in the package.


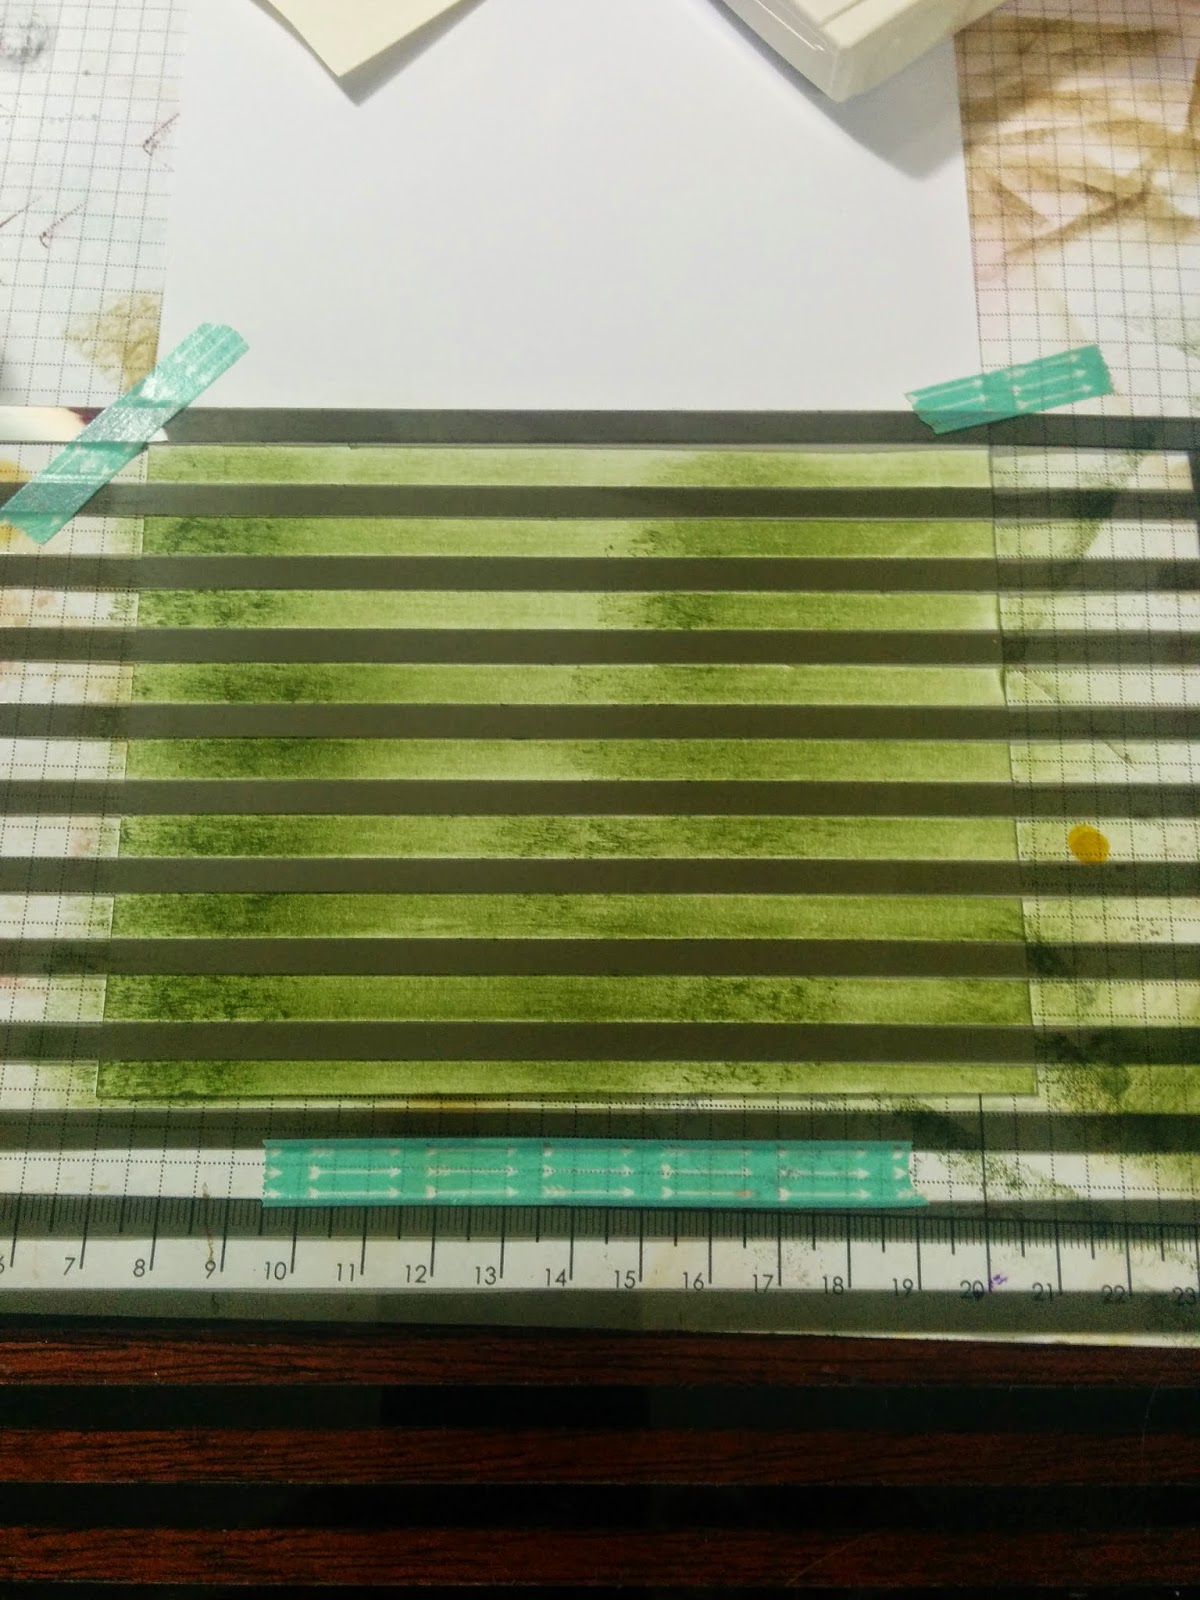
Very important step here:  TAPE YOUR PROJECT!  Be sure to tap your mask to your project AND the surface you are working with.  This will keep the mask from moving around  and your project steady.  Washi tape is fabulous for this because it will not tear the paper and is easy to remove.  Also:  when working with these acetate masks:  use even pressure and move in the direction of the mask, not against it.  For the stripes, I used a sponge in Mossy Meadow and worked from left to right along the stripes.  Sponging gives a more splotchy look and varies the intensity...If you want it to be more uniform in color, use a dauber. 
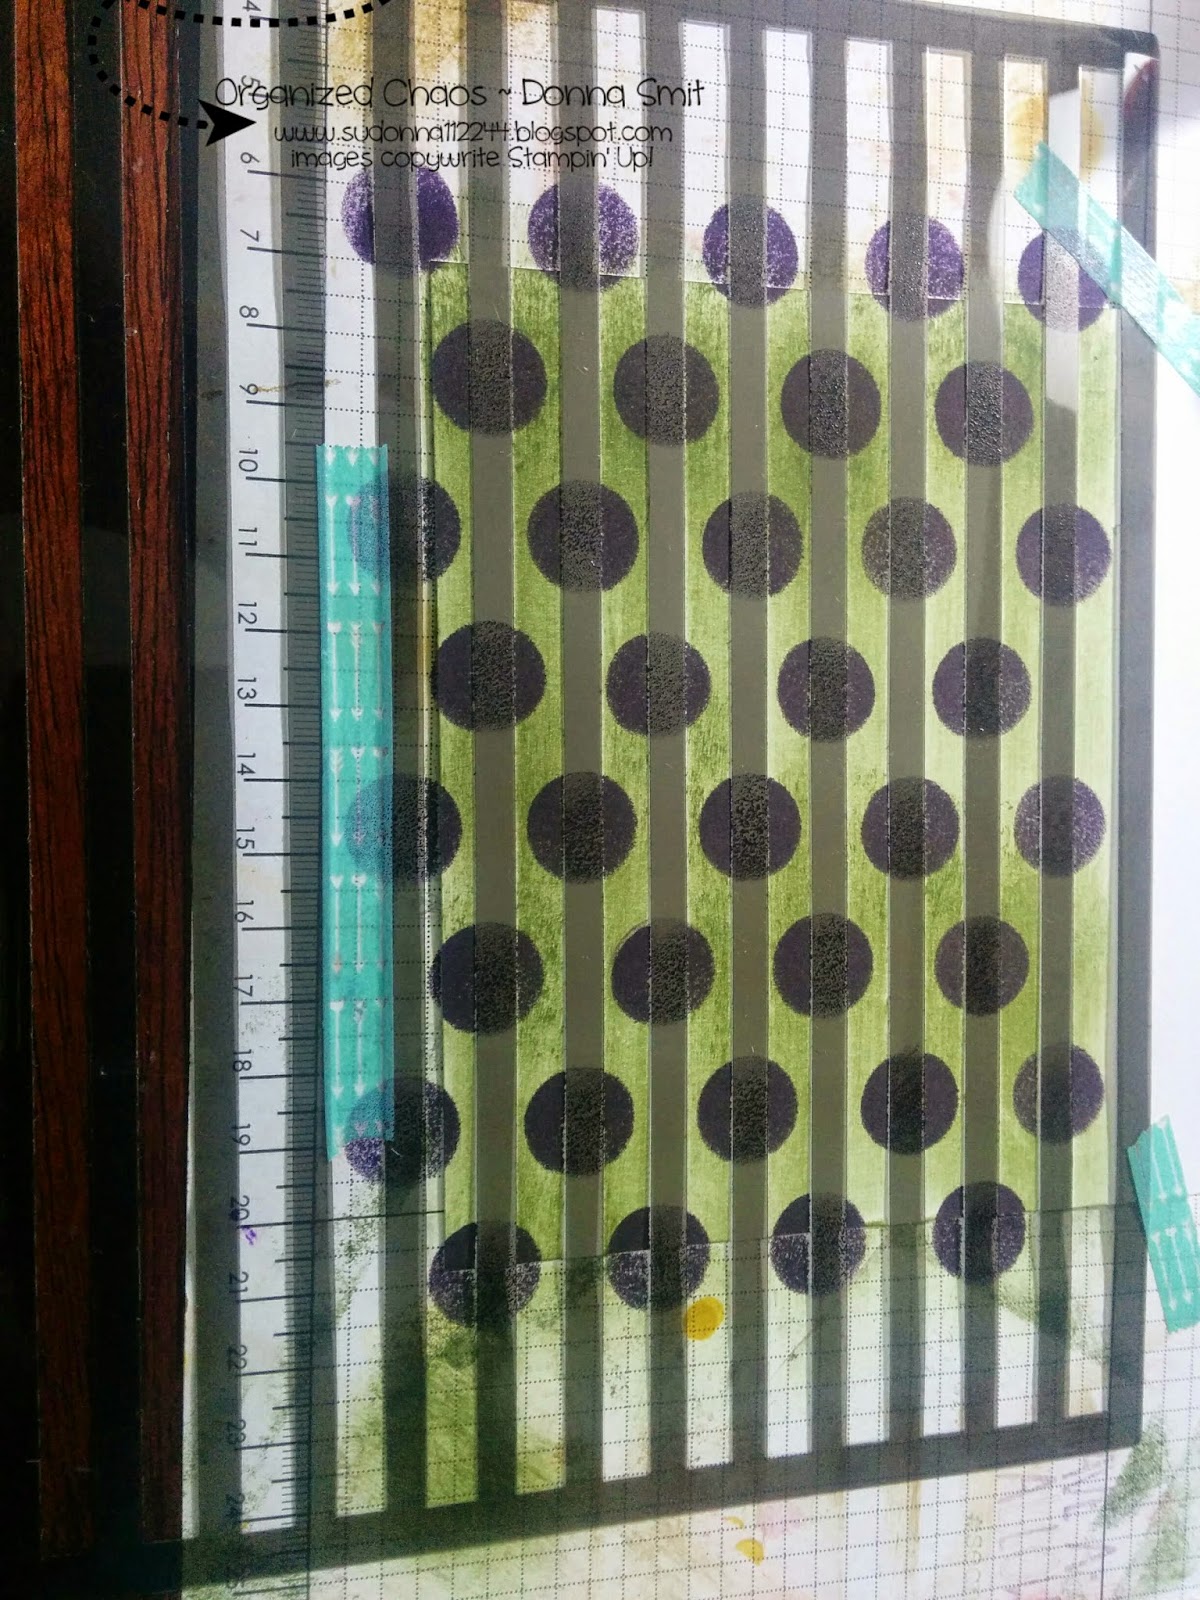
Step 2: LEAVE the stripes mask on the paper and add the Dots mask over the project.  Don't forget to tape it down!

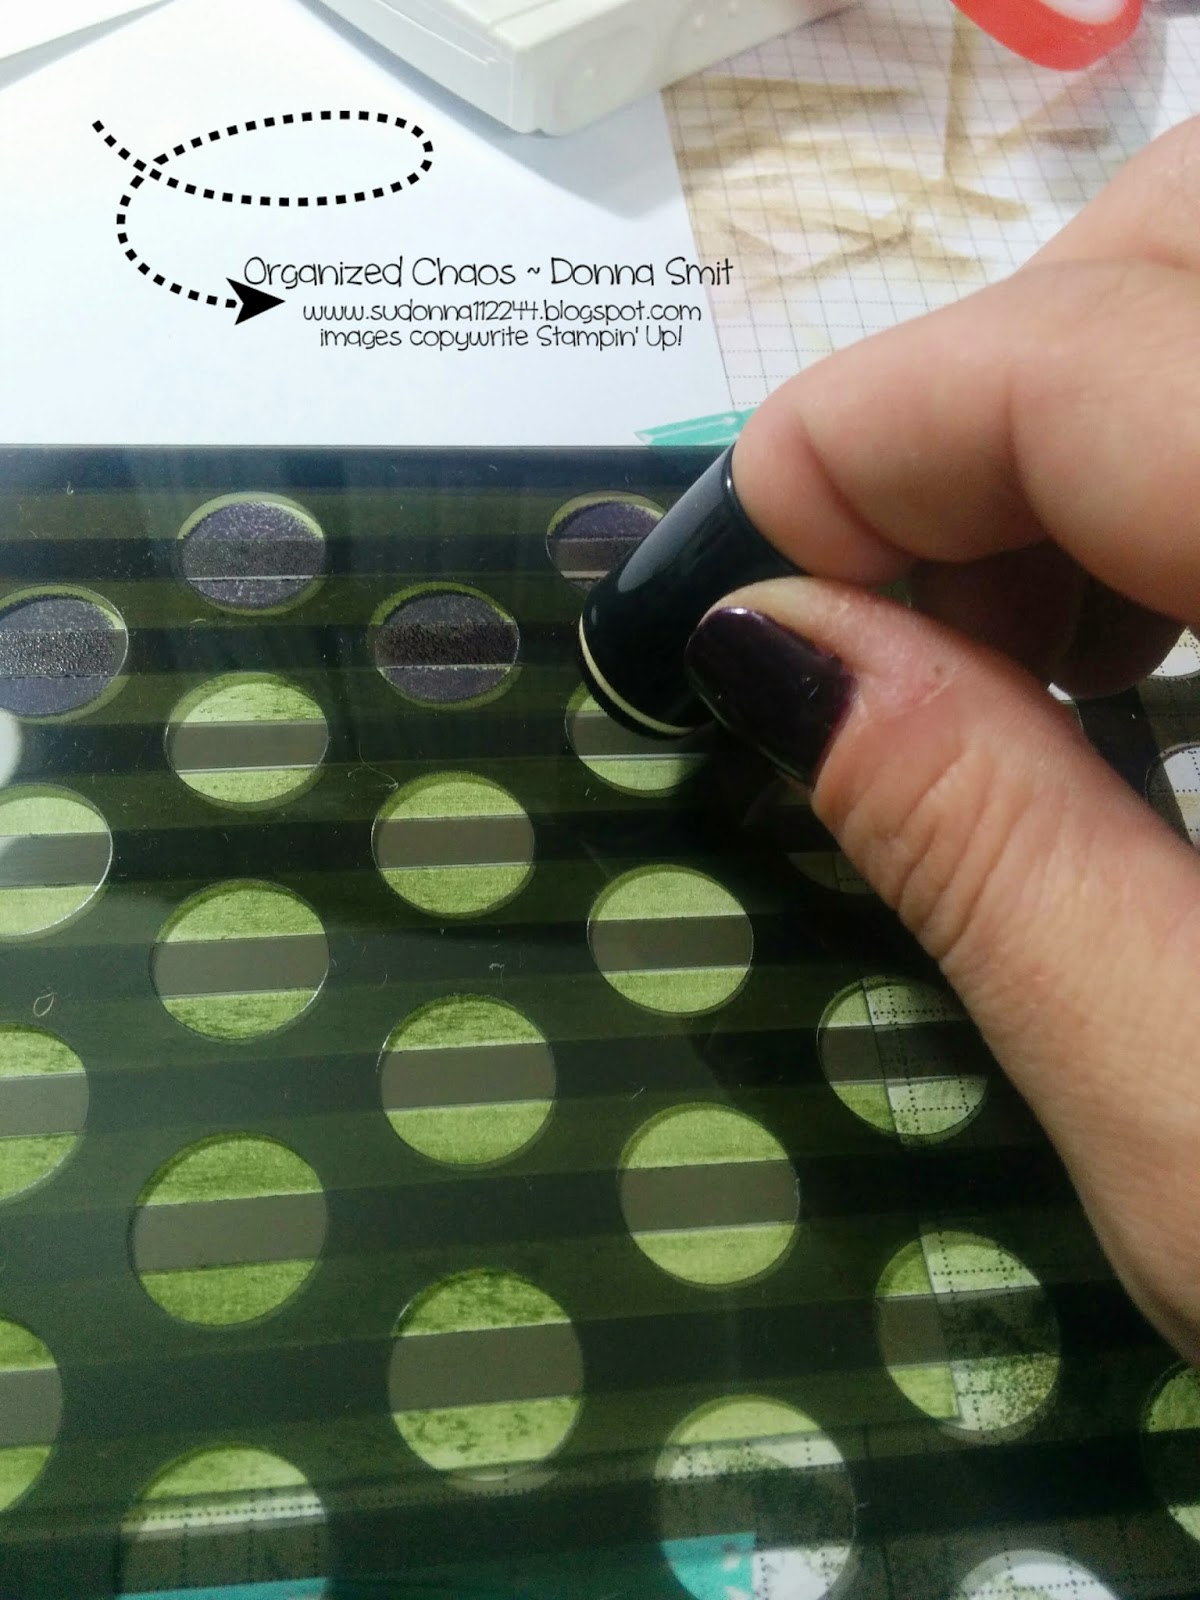
Here I am using a dauber to apply the dots.  It fits PERFECTLY! and you can kind of smoosh it to make sure it gets through to the paper.  once you get ALL of the dots inked....carefully remove the masks.
**note to self:  this is a good time to wipe the masks off with a kleenex...otherwise you end up with purple dots and green strips on your hands.....not that that happens...ever...you know, Just Sayin. **
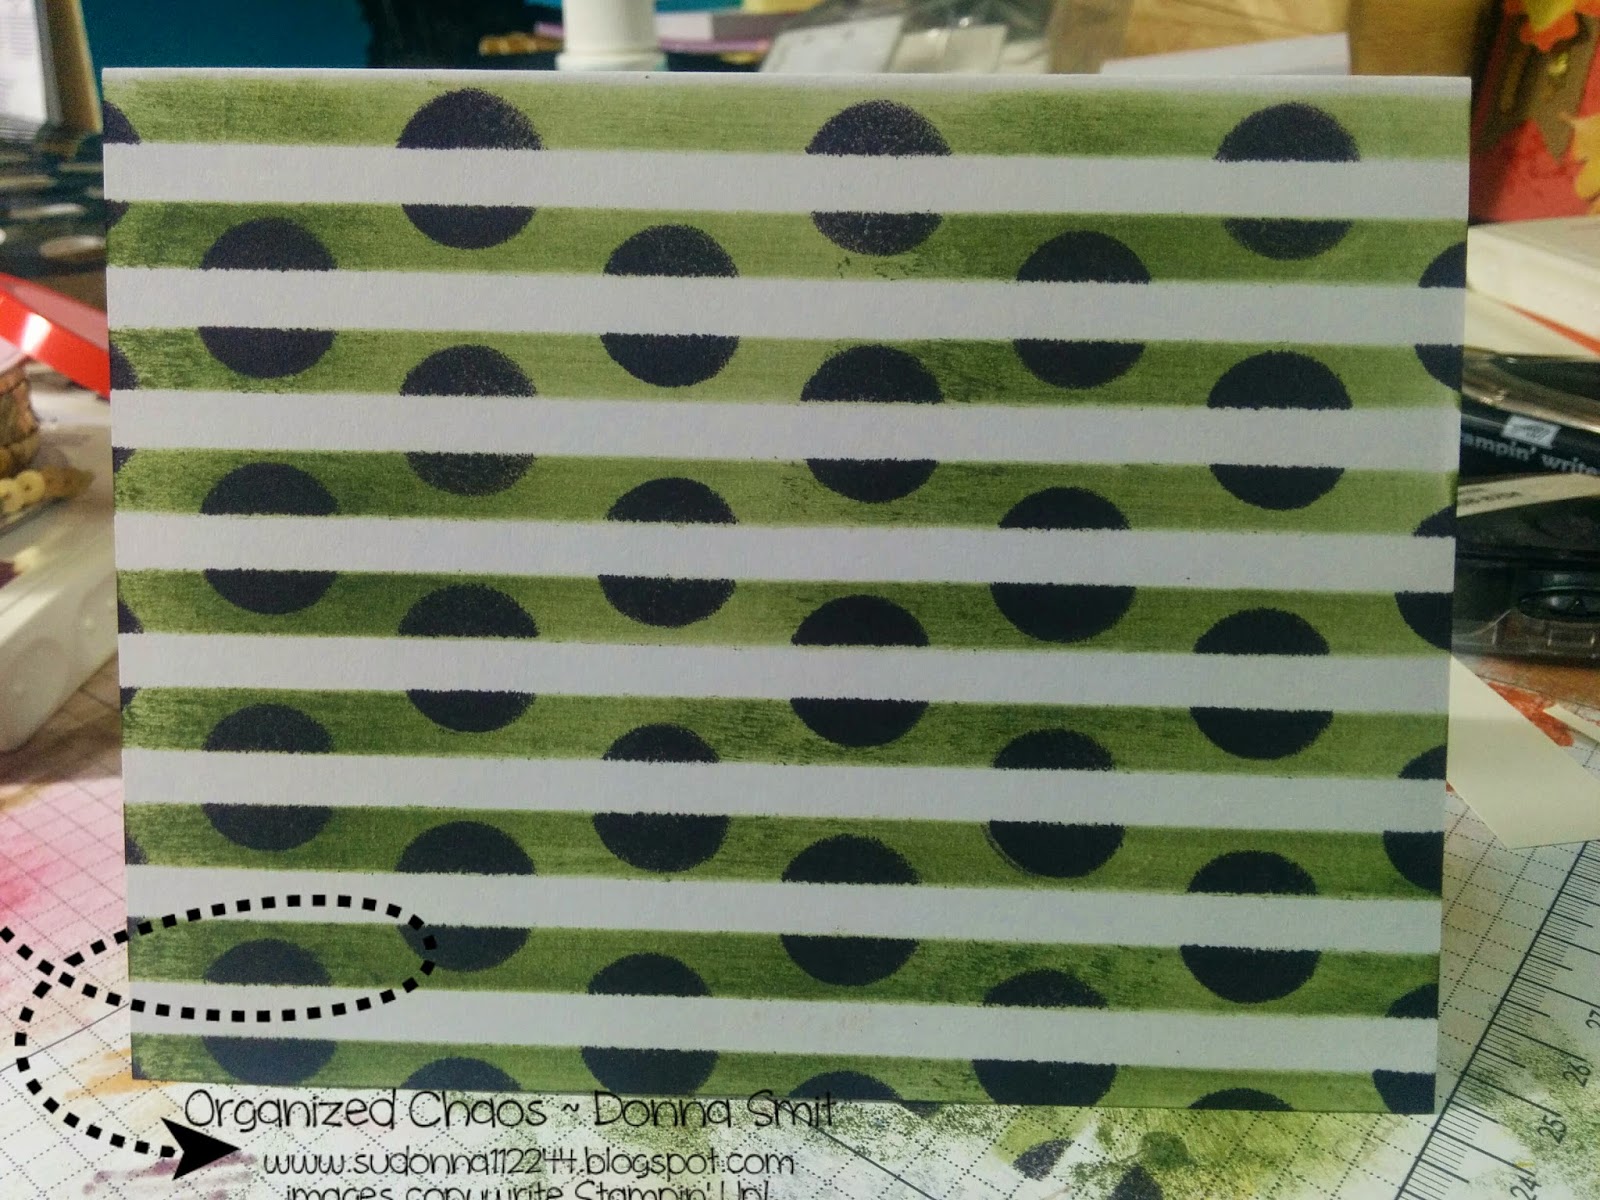
and this is what you get!

Add a few elements and embellishments and you're done!

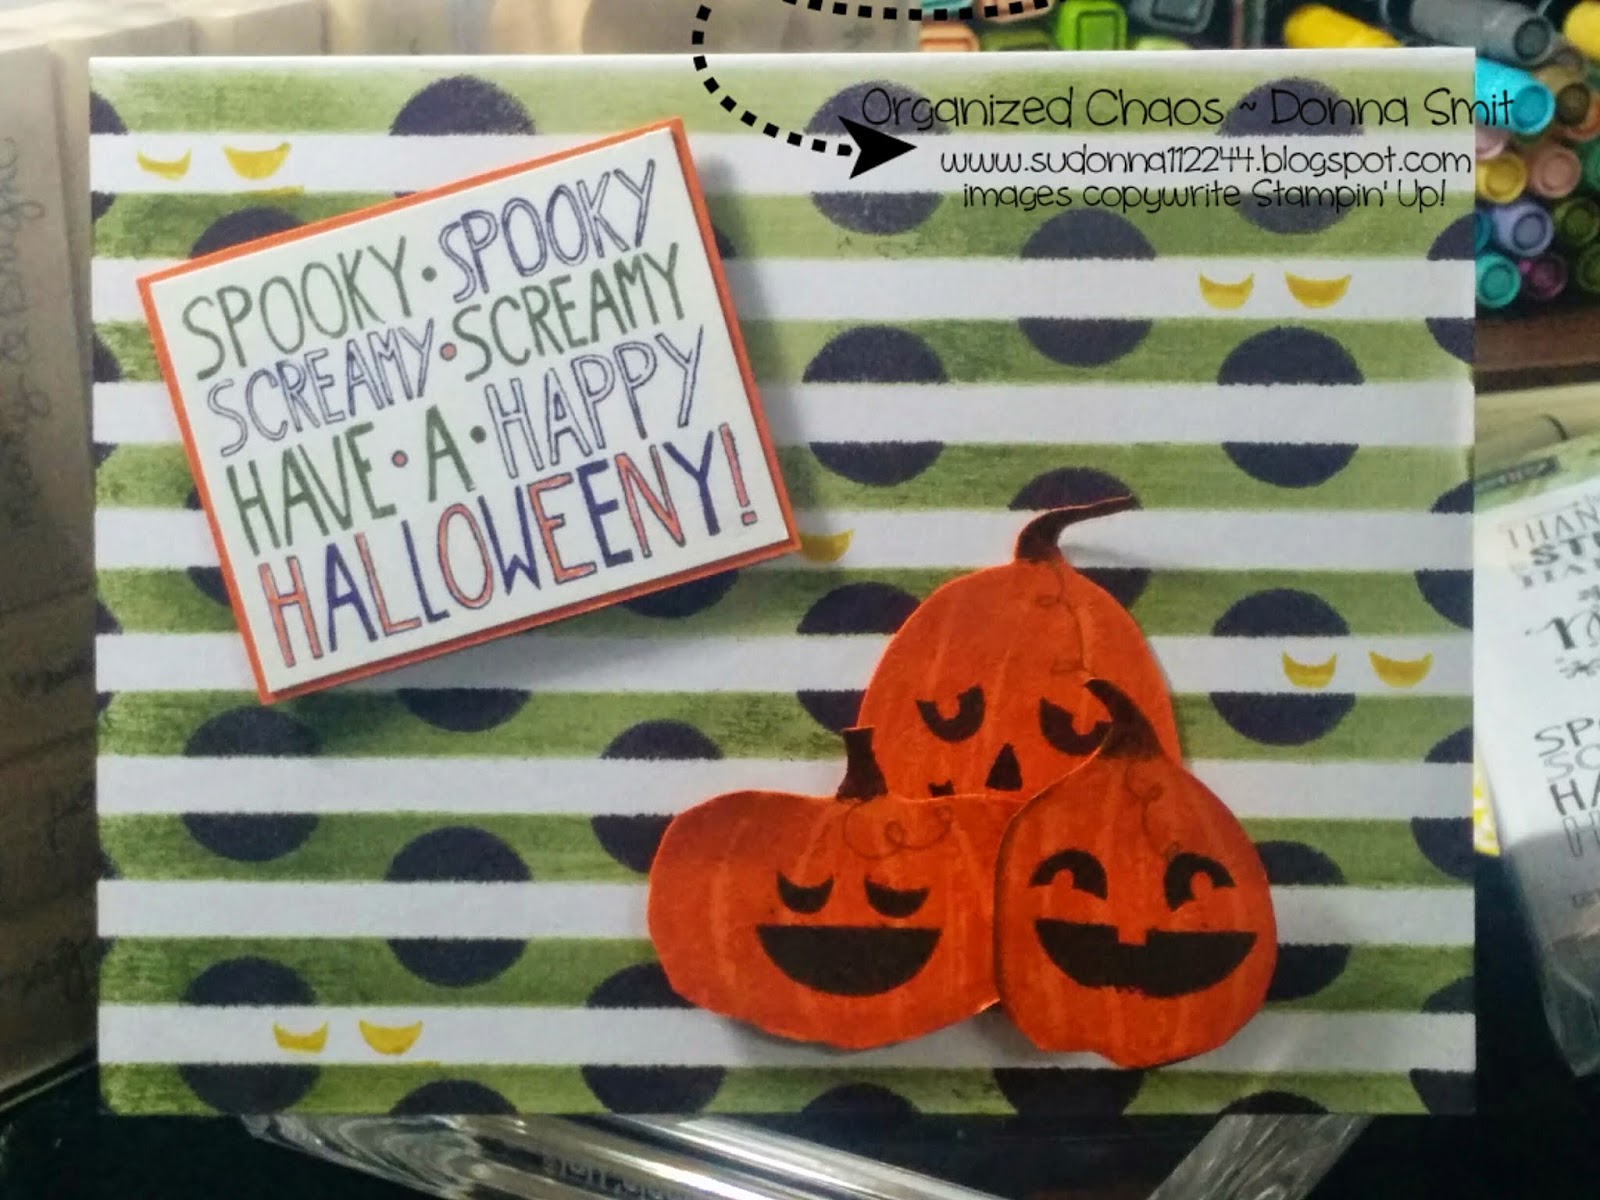
Check out what our fabulous designers made with their masks!  Remember:  anything you can use to COVER the paper and ink around is a mask!  Check out each of their blogs to see what mask they used and get the tricks and treats of their process!

Donna Smit ~ Organized Chaos


Pam Steckman ~ Stampin' in the Sun


Darcy Johnson ~ Dj's Stampin' Place


Kim Ryden ~ Stamping with Kim


Kristy MacKeen ~ Mama's Sanity

Be sure to check back tomorrow for a cute project from our designer Diana!

Thanks for stopping by today for your daily SSInkspiration! Don't forget to check out our Facebook and Pinterest pages for even MORE Inkspiration!